A Step-by-Step Guide to Cleaning Your Laptop Screen
CLEAN LAPTOP SCREEN – In this article, we’ll show you how to clean your laptop screen thoroughly enough.
Do you know the best way to clean a laptop screen? Or, at the very least, without endangering it or, in the worst scenario, causing any damage. Working from home makes it simple to disregard the clutter that accumulates on our screens, and you might not even notice that things are out of control until you are unable to see the finer details.
For creative professionals, maintaining a clean screen is crucial for curating top-notch content. It’s challenging to achieve this when your display bears the marks of lingering coffee spills or stubborn smudges. If you own one of the best laptops for graphic design or photo editing, preserving the integrity of your screen is paramount.
Besides content quality, a clean screen is also vital for your health, as it can harbor harmful bacteria. The most effective way to address this concern is by using an antimicrobial screen protector. However, before applying one, you must thoroughly clean your laptop screen, and we’ll guide you through the process.
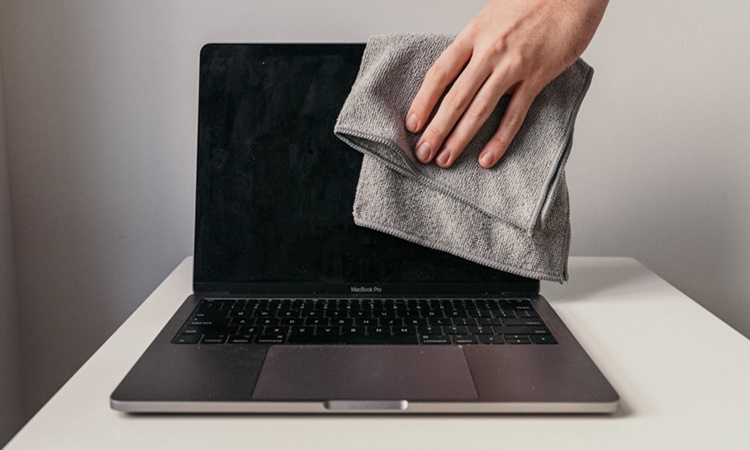
Step 1 – Grab a cloth
Let’s start at the very beginning. The first step is to shut down your laptop completely and disconnect or eject any connected devices. This precautionary measure ensures your system’s safety, as it’s better to be safe than sorry in case any liquids come into contact with it.
Next, acquire a cloth, specifically a soft, lint-free cloth like a microfiber one. Wipe your screen in circular motions with a gentle amount of pressure to eliminate surface dust and visible debris. This method may be the simplest and most accessible way to clean your laptop screen, but as many of us are aware, it can sometimes leave smudges and streaks. In such cases, you may require some specialized products to achieve a truly spotless screen.
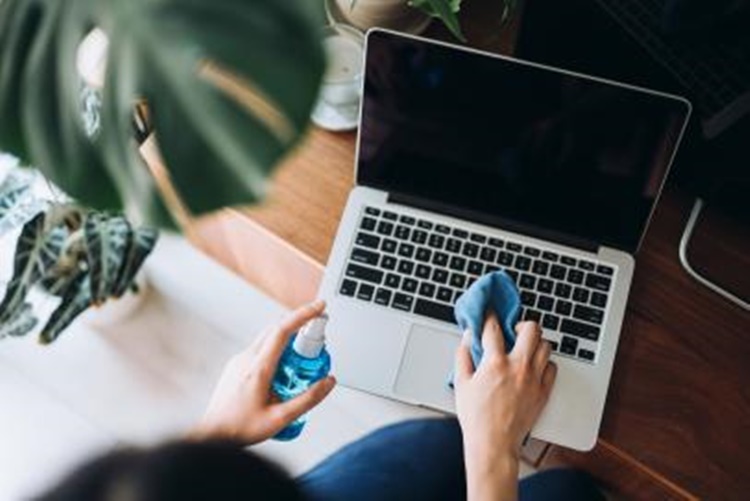
Step 2 – Use some liquid solution (optional)
Feel free to employ a small amount of distilled water when tackling persistent stains while cleaning your screen. However, it’s crucial to avoid alcohol-based solutions at all costs, as they can harm your display. Similarly, steer clear of using tissue paper or surfaces with a slightly abrasive texture. Avoid using the wet or damp portion of your cloth for cleaning the corners of your laptop screen.
Lenovo suggests making a natural cleaning solution by mixing equal parts white vinegar and distilled water. Apply this solution using the same gentle cloth, but refrain from spraying it directly onto the screen. Ensure you wipe off any excess liquid with a microfiber cloth.
Step 3 – Dry your screen
Now that you’ve cleaned your laptop screen to the best of your ability, it’s time to dry it using a different cloth (one that is still soft and free of lint) from the one you’ve been using. This step ensures that your screen is completely dry before you power your laptop back on.
You can exert a bit more pressure on the screen to remove stubborn marks, but be cautious not to apply excessive force, which could potentially damage the display and leave subtle dents.
Achieving a perfectly gleaming screen might require a few attempts and re-cleaning, but rest assured, the effort will be worthwhile.
Step 4 – Invest in a screen protector
Your screen is now clean, but what’s next? To maintain its cleanliness, we strongly recommend investing in a screen protector. This will help keep your laptop screen free from scratches and shield it from spills and everyday wear and tear.
Premium laptop screen protectors offer additional advantages, such as privacy protection to prevent onlookers, defense against blue light, and antimicrobial coatings that combat bacteria.
Please like and follow/subscribe:
Newspapers.ph
Newspapers YouTube Channel
Newspapers Facebook Page